

Making baby food is not as hard as it sounds. A lot of moms feel intimidated by the idea but in honesty, they really don’t need to be.
After reading this post, I hope to enlighten you to the fact that making baby food at home can be done in one day within a few hours and come out with enough supplies to last months! Yes, that’s right, MONTHS!
I don’t shut down my kitchen multiple times to make several batches of baby food, I get it all done in one day. The baby food menu is filled with a large variety of ORGANIC fruits and vegetables.
Better yet, I was able to buy ALL THE FOOD at Aldi’s! I love Aldi’s, and I love to save money. I am super excited to share with you at the end of this post how much I spent on all the food and how much I saved compared to what you would have spent on the same amount of food at the grocery store.
This post contains affiliate links. For more information, see my disclosures here.

MY EXPERIENCE WITH MAKING BABY FOOD
I have been making baby food for the past 5 years, ever since my oldest turned 6 months old. This time around was my 4th go at it. I finally have mastered it to be more time efficient, and I was capable of being smarter with my money.
The first time I went shopping for produce to make homemade baby food (5 years ago), I went to Trader Joe’s to get organic fruits and vegetables. This time, I was able to get everything on my grocery list at Aldi’s to make ORGANIC baby food. It was a huge savings.
Related: How To Save Money On Baby Food
Five years ago when I started looking into making baby food at home I had absolutely no idea what I was doing. I spent hours looking on youtube to find instructional videos on how to make baby food. I had to look up all different kinds of videos for each individual food choice.
I searched how to make sweet potato baby food, how to make pea puree for baby food, the quickest way to make squash baby food, and so on. Each video came up separate from the other. Every mom on youtube had different techniques and some were better than others.
All in all, it was time consuming, and I didn’t have time to watch all these videos.
I just wanted an all in one video that taught me how to make all kinds of baby food in one day. What’s the quickest way I can make baby food, and is it worth my time? Do I actually save money with the effort I spend on making the homemade baby food? The answer is YES! I’ll explain more in a bit.
First let’s get into the planning behind your fun day in the kitchen!

Planning How To Make Homemade Baby Food
I spent one day at the grocery store and another day in the kitchen. You can do this all in one day if you choose. Sometimes my schedule doesn’t allow for me to get two big tasks done in one day.

GROCERY SHOPPING DAY
1. Get a piece of paper and a pen to make your shopping list (well, that was easy!)
2. Write down the baby food items you want to make
Typically baby’s first foods (that you purchase at the store) include: apples, pears, bananas, sweet potatoes, squash, peas, spinach, broccoli, avocado, carrots, and zucchini.
Since I shopped for everything at Aldi’s, all the produce I purchased came prepackaged (which is what Aldi’s typically does for a majority of their organic produce).
Related: 17 Expert Tips For Cry-Free Shopping With Kids
HERE’S THE LIST:
-
- Apples (1 bag)
- Pears (1 bag)
- Bananas (1 large bunch)
- Sweet potatoes (1 bag)
- Squash (1 large squash)
- Peas (1 frozen bag)
- Spinach (1 container of fresh spinach)
- Broccoli (1 package = 2-3 Broccoli Florets)
- Avocado (1 bag = 5 avocados)
- Carrots (1 bag)
- Zucchini (1 container = 3 zucchini’s)
Feel free to purchase everything on this list or take a few items off, or maybe add some more items to the list. It’s your baby and you’re the mom, you can decide what’s right for your child.

3. Check your kitchen to see if you already have these items:
-
- Pans and a casserole dish
- 14 Ice Cube Trays
- Pots, several sizes
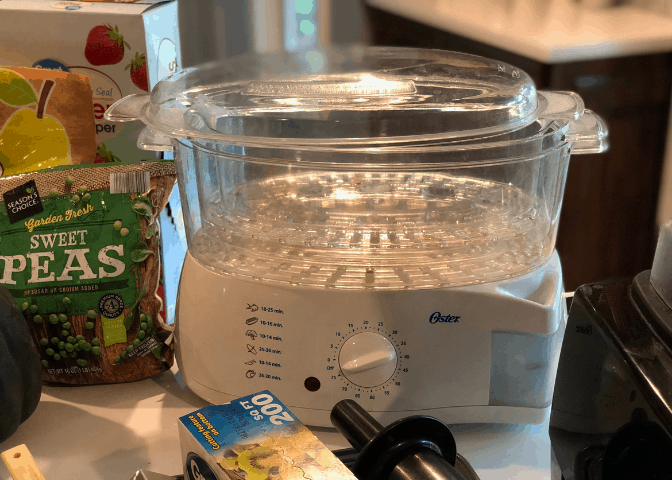
- Steamer, such as the Oster Electronic Food Steamer (or a basket steamer to go into your pot)
- Food processor, VitaMix Blender, or another high powered blender that can tolerate many batches of food
- Cutting Board
- Strainer
- Peeler
- Sharp Cutting Knives
- Forks
- Bowls
- Spatulas
- Foil
- Plastic Wrap
- Freezer Zip Lock Bags (your preference on size)
- Sharpie
- Baby bowl and spoon to feed your baby his or her first bite!
If there is something you don’t have, write it down on your grocery list and make sure you buy it before you start the cooking
Ok, do you have everything? Do you have your list? Let’s go shopping!
Like I said earlier, I found everything at Aldi’s. Give it a try and you will be amazed at how much you save. They have really improved their organic section. I love shopping there early in the morning before all the produce gets picked over by the crowds.
When you come home and unload your car, let’s start the next step: make all the baby food all at once!
HOW TO MAKE “ALL THE HOMEMADE BABY FOOD YOU WILL EVER NEED” IN 1 DAY
That’s right, you will only have to do this one time. One day is all you need and you will have ALL the homemade baby food you will need for your little baby. It’s enough pureed food to last your baby until she is ready for finger foods and more solid-type foods.
Block off about 2-4 hours of time where you won’t be leaving the house. It’s ok if you get interrupted during this time, but I just want to make sure you don’t have plans to leave for an appointment or get another kid at school.
This 2-4 hour window is roughly how long everything should take. If you need to stop and nurse your baby, there is plenty of time to do that. If you need to put your baby down for a nap, you will have time for that, too.
There are moments during the cooking when you can take a break! The food will not go anywhere. It can wait for you when you are done. Don’t feel pressured to get it all done in 1 hour, take your time so that your baby food turns out great!
34 STEPS TO MAKING HOMEMADE BABY FOOD
Jena’s Tip: Make sure you do not cross contaminate cutting boards, forks, knives, peelers, blenders, pots, pans or any other kitchen supplies while cooking your baby food. You do not want any baby food to mix since this is your baby’s first time eating these foods. You want to make sure the foods you make are completely pure to the original food (and not mixed with another food), remember this throughout the entire cooking process!
1. Unload the Groceries and put everything you need from the list above out on the counter
2. Set Oven for 400 degrees for sweet potatoes and squash

a. Clean ice cube trays, pots, pans, casserole dish, knives, forks, food processor, cutting board, strainer, spatula, bowls, peeler
b. Wash all produce in a sink full of hot water
4. Sweet Potatoes: take a sharp knife and poke about 3 holes in each sweet potato before wrapping each one individually with foil. Place each wrapped sweet potato on the pan. Place the pan on the bottom rack in the oven for 1 hour.

6. Place peeled and cut up carrots into the steamer. I have had the Oster Electronic Food Steamer since I got married, almost 10 years ago. I received it as a wedding shower gift! I absolutely love it for so many reasons. It makes it so easy to cook the food to the perfect consistency, it’s quick and starts cooking immediately, it’s easy to clean up and the best part is you can cook multiple foods at the same time (double-tiered stacked baskets). If you don’t have a steamer, some people use a steaming basket (follow directions that were included with your steaming basket). We will add broccoli to go with it so do not turn it on quite yet.
7. Chop up the broccoli on your cutting board using a sharp knife. You may keep the broccoli in large chunks. Place the large chunks in your steamer. Place the organic baby carrots next to the broccoli in the steamer but in a way so they are not touching each other. If you are using a steaming basket, use two separate pots or do one food at a time.

9. Cut the squash in half, take a spoon to scoop out the seeds from both sides. Fill your baking dish with about 1 inch of water. Place the cut side (or the meat side) of the squash down into the water. Place the baking dish in the same oven that was set earlier at 400 degrees for 45 minutes (on the middle rack).

11. Chop the apples into large chunks. If you feel the apples and they seem very hard, you can steam your apples for 10 minutes; however, this will cause the apples to lose some nutrients. If your apples are somewhat soft, you can just blend them as is. For now, set them aside in a bowl after they are chopped up.
12. The same instructions go for the pears as well. Once chopped, set aside in a bowl.

13. By now the broccoli and carrots are done. Place them in a bowl to sit while you steam the spinach. Place the spinach in the cleaned steamer (or steaming basket) and steam for 10 minutes. Then set aside in another bowl.
14. Peel the zucchini before chopping it into large chunks. Once chopped, place the zucchini in the cleaned steamer or steaming basket and cook for 20 minutes.
15. We are going to save the avocado and the bananas for later since we can blend them right when we need them, but next we are going to start blending all the other foods.
IT’S BLENDING TIME
16. Get your food processor or blender out to puree the foods. There are so many options here, but I wouldn’t look any further than the VitaMix! This blender is unlike any other. Wait until you try one of these-it’s absolutely amazing! I have been using the VitaMix practically every day for 8 years, and it’s still going strong. The power that comes from this blender is amazing! Since I absolutely love the VitaMix for blending and making purees, I will be referencing it throughout this post.


19. Make sure you clean the blender between each food!
20. Next you can blend the apples. Follow the same steps you did for the pears (making a thick batch and a thin batch). You can always add water a little bit of water at a time if the consistency gets too thick initially or if your blender gets a little stuck.
21. Continue to wash the blender and blend the next steamed food item. When it comes to the vegetables, you might need to add some water to thin it out since the vegetables tend to get rather thick in the blender. (If you saved any residual water from the peas, or other vegetables you steamed in a pot, you can use that water to blend with since it has a lot of important nutrients in it).
22. An hour or more has gone by and your sweet potatoes and squash timer probably went off by now. Hopefully you pulled them out of the oven when the timer went off!!! Please say “YES, I took them out of the oven!”
23. After your sweet potatoes and squash have sat out to cool off a bit (around 10-20 minutes), start unwrapping the sweet potatoes first.
24. Once all the sweet potatoes are unwrapped, slowly peel off the skin of the sweet potato and use a knife to help loosen it. Slice each potato into about 3-4 chunks. Once it’s cool enough to handle, take the inside of each sweet potato and place them all into another bowl. When you are ready, go ahead and blend them.
25. For the squash, once it has sat out for 10-20 minutes to cool, you want to cut the inside into chunks and scoop out the contents into a bowl. It should be extremely soft and easy to handle.
MY 2 FAVORITE “GO-TO” BABY FOOD OPTIONS: AVOCADO AND BANANAS
26. When you are ready to make the avocado and banana, all you need to do is make it on the spot before feeding your baby.
27. When making banana for your baby, you want to use a ripe banana (very soft). You can mush it within the banana peel before actually opening the banana up. Then peel it and place it in a medium sized bowl and use a fork to mash it up. Continue to mash and stir until it is thin with very minimal chunks throughout. It is ready to serve! (I do not save any extra banana since it browns very quickly).
28. For the avocado, you will do the same as the banana. First, wash the outside of the avocado if you have not already. Roll the avocado on the counter to loosen it up and soften it. Cut the avocado in half and make sure you cut around the large pit inside. Once the avocado is opened up, remove the pit and take out the contents with a spoon. Place the avocado in a medium sized bowl and mash it up with a fork trying to remove any clumps. Once the avocado is a smooth consistency, it is ready to serve to your baby. (I have not saved any leftover avocado since it browns very quickly.)

30. Get your sharpie marker and label each food by its name and if it is thin or thick. You do not need to write the date yet since we eventually will be transporting the food into a zip lock freezer bags.
31. Let the food freeze in the freezer, nicely stacked for several hours until each cube is fully frozen.
32. While the trays are freezing, you can go ahead and get your zip lock bags ready with the names of each food. If you know which ones you made thick and thin, label that as well. Also, you want to write the date on each bag.

34. And you are done! You should have at least 10 bags of frozen baby food. I am so proud of you for sticking with it and getting that job done! Yes, it was a job.

YOU DID IT!!
Now, sit down, take a look and say “WOW, I JUST DID THAT!!!”. Can you believe it? That wasn’t so bad, was it? Your baby is going to be a happy baby when she eats all the food that her mommy put all that time and love into.
You have to feel good knowing exactly what is going into your baby’s belly. You should be a proud mommy right now after accomplishing that with a little one in the house. The good thing is, you won’t have to do it again! One And Done!
I hope you have more confidence in making baby food now! You better have more confidence, especially since you just finished cooking a huge batch of 11 different types of baby food!

Now, financially, was it worth it? For sure it was! I give you the breakdown of the financial savings for this whole extravaganza in a separate post. Make sure you check it out!
I also created a video from my day in the kitchen! This video shows you exactly how I made all the baby food, step by step, so that it’s easier to understand visually. It’s also nice to see what the baby food actually looks like “live and in person”. I go over the different consistencies of the baby food. At the end of the video, I break down the spending and the savings!
You really want to check it out.
If you have any questions regarding homemade baby food, please leave a comment below. I would love to hear from you. Let me know how your baby food turned out. Which food does your baby like the best?
Keep Smiling,
Dr. Jena Bradley, DPT
This post contains affiliate links. For more information, see my disclosures here.


Wow this is awesome! My husband and I food prep for ourselves but it never occurred to me to do it all at once for baby too! Rookie mom question, do I make a thick and thin version of each food? Or just the pears and apples?
And what quantity did you buy? Was it whatever is standard at Aldi ie 1 bag of carrots, 1 bag of spinach, etc?
Confession time: once I was at your house making a smoothie in your awesome VitaMix and I didn’t know what the cubed stuff in the freezer was for. Pretty sure I put some sweet potato babyfood in my smoothie! Oops sorry 🙂
Jessica, these are great questions! I recommend making a thick and thin batch for every food however, some foods tend to naturally stay thin (and never really get thick). Some of these foods include pears, zuchinni and squash. These foods tend to be more runnier and more watery in nature. Experiment and see what you get! When actually feeding your baby pureed foods, if she is ready for thicker food, I like to add baby cereal to any puree that is too thin. The cereal quickly thickens any puree.
I will add some extra notes within the post regarding food quantity. But the quantity of food was actually determined by Aldi’s since everything came packaged in a bag. So whatever the standard bag of organic sweet potatoes was, I used it all. The same goes for the rest of the food. To get a better idea of portions, take a look at the pictures to see what the bagged items looked like.
Side note, I bet that sweet potato ice cube tasted extra good in the smoothie you made!